Activating a TwinCAT 3 project
Once a TwinCAT C++ project has been created, compiled and made available, the configuration must be activated:
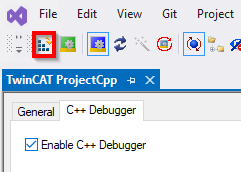
- 1. Click on the symbol Activate Configuration – all required files for the TwinCAT project are transferred to the target system:
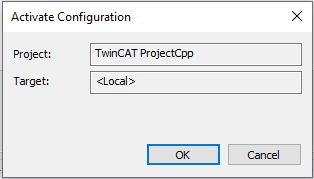
- 2. In the next step, confirm the activation of the new configuration. The previous old configuration will be overwritten.
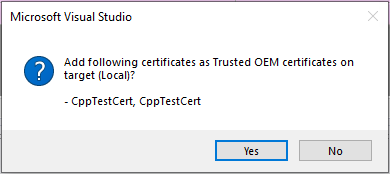
- The certificates required for execution are displayed and can be approved automatically:
- 3. If you have no license on the target system, you will be offered the option to create a 7-day trial license. This can be repeated any number of times.
- 4. TwinCAT 3 automatically asks whether the mode should be switched to Run mode.
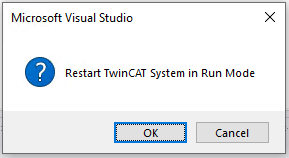
- With OK the TwinCAT 3 project changes to Run mode.
With Cancel TwinCAT 3 remains in Config mode.
- After switching to Run mode, the TwinCAT System Service symbol at the bottom in Visual Studio lights up green.