Create a TwinCAT task and apply it to the module instance
This page describes the linking of a module instance to a task, so that the cyclic interface of the module is called by the TwinCAT real-time system.
This configuration step only has to be carried out once. No new task needs to be configured for subsequent creations/new compilations of the C++ module in the same project.
Creating a TwinCAT 3 task
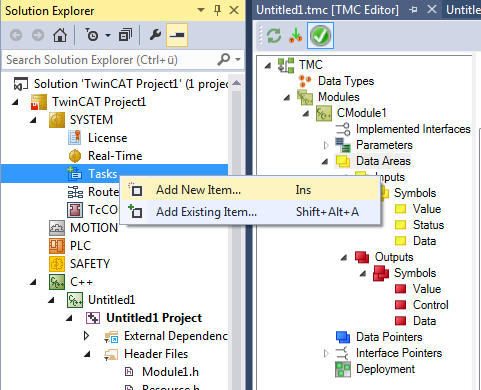
- 1. Open System, right-click on Tasks and select Add New Item….
- 2. Enter a unique name for the task (or retain the default name).
In this sample the I/O image interface is provided by a C++ module instance, so that no image is necessary at the task for triggering the execution of the C++ module instance.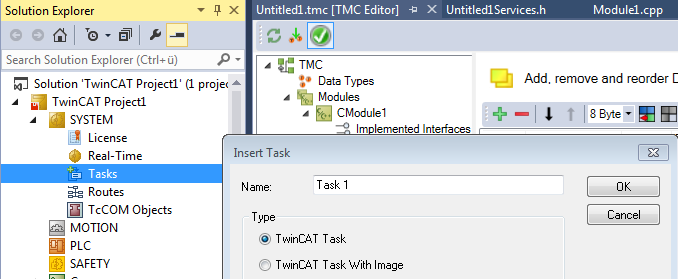
- The new task with the name "Task 1" has been created.
- 3. The task can now be configured; double-click on the task to do this.
The most important parameters are Auto start and Priority:
Auto start must be activated in order to automatically start a task that is to be cyclically executed. The Cycle ticks define the timing of the clock in relation to the basic clock (see real-time settings).

Configuring a TwinCAT 3 C++ module instance that is called from the task
- 1. Select the C++ module instance in the solution tree.
- 2. Select the Context tab in the right-hand working area.
- 3. Select the task for the previously created context in the drop-down task menu.
Select the default Task 1 in the sample.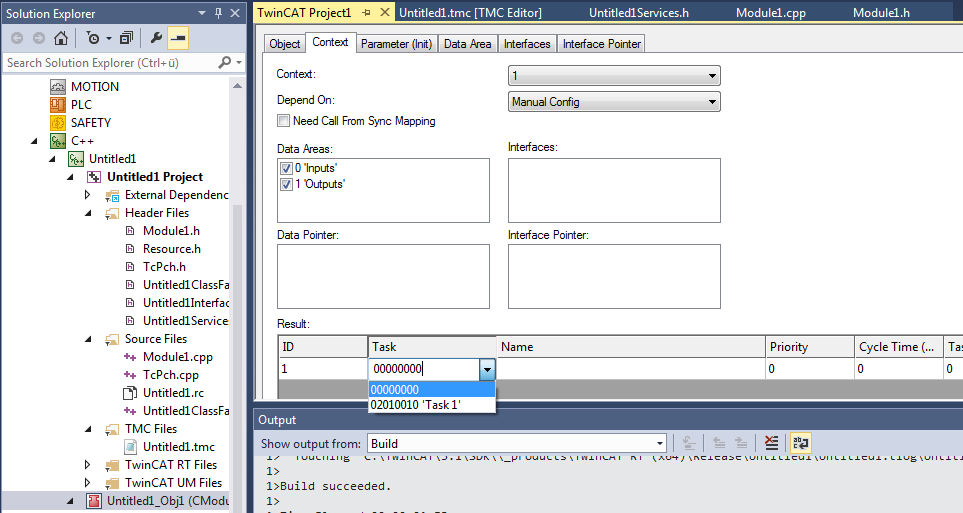
- On completion of this step the Interface Pointer is configured as a CyclicCaller. The configuration is now complete!