Creating and handling CANOpen devices
This article describes how CANopen master and slave devices are created and handled using the TwinCAT Automation Interface. It covers the following key topics:
- Creating and adding a CANopen master
- Searching for and configuring suitable devices (EL6751, FC510x etc.)
- Creating and adding a CANopen slave
- Searching for and configuring suitable devices (EL6751-0010 etc.)
- Importing DBC files via the Automation Interface
Creating and adding a CANopen master
To create a CANopen master device, open a new or existing TwinCAT configuration and scan all devices. Remember that these actions can also be carried out via the Automation Interface.
Create a system manager object and navigate to the devices.
Code snippet (C#):
project = solution.Projects.Item(1);
sysman = (ITcSysManager)project.Object;
ITcSmTreeItem io = (ITcSmTreeItem)sysman.LookupTreeItem("TIID");
Code snippet (PowerShell):
$project = $sln.Projects.Items(1)
$sysman = $project.Object
$io = $sysman.LookupTreeItem("TIID")
Use the ITcSmTreeItem:CreateChild method to add a CANopen master:
Code snippet (C#):
ITcSmTreeItem5 can_master = (ITcSmTreeItem5)io.CreateChild("Device 2 (EL6751)", 87, "", null); Code snippet (PowerShell):
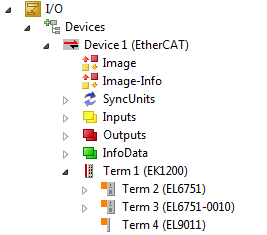
$can_master = $io.CreateChild("Device 2 (EL6751)", "87", "", $null) Enter the correct ItemSubtype listed here for other CANopen master devices. This will add the new device as shown in the screenshot:
Searching for and requesting a CANopen master device in the list:
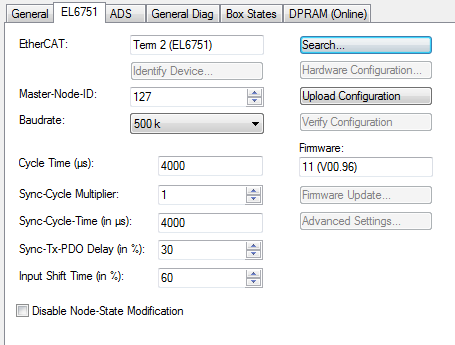
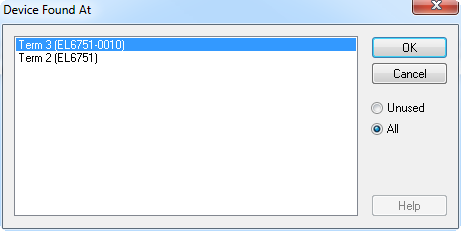
The newly added CANopen master must be configured, which is normally done in TwinCAT by pressing the search button and choosing the correct device from the list.
This can be done via the Automation Interface:
Code snippet (C#):
string availableMaster = can_master.ResourceCount;
can_master.ClaimResources(1);
Code snippet (PowerShell):
$availableMaster = $can_master.ResourceCount
$can_master.ClaimResources(1)
ITcSmTreeItem5:ResourceCount shows the number of compatible CANopen master devices, and ITcSmTreeItem5:ClaimResources takes the index of the CANopen device that is to be configured as the master.
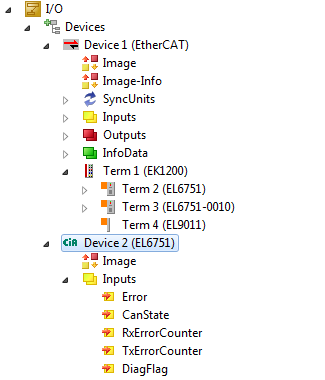
Creating and adding a CANopen slave
A CANopen slave can be added to the current configuration as follows:
Code snippet (C#):
ITcSmTreeItem5 can_slave = (ITcSmTreeItem5)io.CreateChild("Device 3 (EL6751-0010)", "98", null); Code snippet (PowerShell):
$can_slave = $io.CreateChild("Device 3 (EL6751-0010)", "98", $null) Searching for and requesting a CANopen slave
As in the case of CANopen masters, a list of CANopen slaves can be published using the following code:
Code snippet (C#):
string availableSlaves = can_slave.ResourceCount;
can_slave.Claimresources(1);
Code snippet (PowerShell):
$availableSlaves = $can_slave.ResourceCount
$can_slave.Claimresources(1)
The last line in the code designates the EL6731-0010 device as a CANopen slave, similar to the dialog box that appears in the TwinCAT user interface.
Importing DBC files via the Automation Interface
Required version: TwinCAT 3.1 Build 4018 or higher
TwinCAT enables the import of the DBC file via a dialog box, as shown in the screenshot. By right-clicking on a CANopen master, e.g. EL6751, and choosing "Import dbc-file", a dialog box prompts the user to search the DBC file. Click OK to load the CANopen configuration automatically.
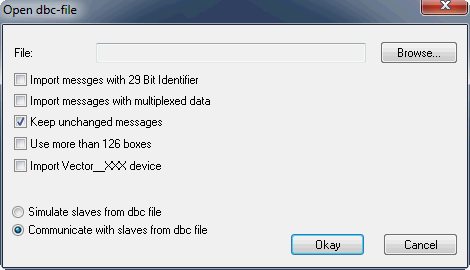
Automation Interface also supports the DBC file import. To do this, navigate to the CANopen master tree item and export the XML file via ITcSmTreeItem:ProduceXml(). In the XML file, add the path to the DBC file to be imported, along with the other properties that are part of the dialog box shown above.
<DeviceDef>
    <AmsPort>28673</AmsPort>
    <AmsNetId>172.17.251.109.2.1</AmsNetId>
    <AddressInfo>
        <Ecat>
            <EtherCATDeviceId>0</EtherCATDeviceId>
        </Ecat>
    </AddressInfo>
    <MaxBoxes>126</MaxBoxes>
    <ScanBoxes>false</ScanBoxes>
    <CanOpenMaster>
        <ImportDbcFile>
            <FileName>c:\dbc_file_folder\dbc_file_to_be_imported.dbc</FileName>
            <ImportExtendedMessages>false</ImportExtendedMessages>
            <ImportMultiplexedDataMessages>false</ImportMultiplexedDataMessages>
            <KeepUnchangedMessages>true</KeepUnchangedMessages>
            <ExtBoxesSupport>false</ExtBoxesSupport>
            <VectorXXXSupport>false</VectorXXXSupport>
            <CommunicateWithSlavesFromDbcFile>true</CommunicateWithSlavesFromDbcFile>
        </ImportDbcFile>
    </CanOpenMaster>
    <Fcxxxx>
        <CalculateEquiTimes>0</CalculateEquiTimes>
        <NodeId>127</NodeId>
        <Baudrate>500 k</Baudrate>
        <DisableNodeStateModification>false</DisableNodeStateModification>
    </Fcxxxx>
</DeviceDef>
Import the modified XML file back into the TwinCAT configuration via ITcSmTreeImte:ConsumeXml(). The configuration is now loaded under CANopen master.