Configuration
The RFID reader is automatically recognized as a smart card reader after insertion. However, as it has not been configured any further, it cannot yet read chip cards. For the configuration, you must download the "Baltech Tool Suite" from the following link: https://www.baltech.de/wp-content/uploads/3035_tool_suite_5_00_04.zip.
You can download the Baltech Tool Suite on a standard PC with Windows 10 and higher. By configuring the Baltech-based RFID reader, you can make it available for many applications.
Requirements
Before you configure the RFID reader, you must clarify the following aspects:
Criterion | Version |
|---|---|
Interface for data transmission | USB-COM: Serial transmission via an emulated COM port (e.g. RS232) |
USB keyboard emulation: transmission via an emulated keyboard interface; card content is entered in input fields as with a keyboard | |
Supported chip card technology | Card type: e.g. Milfare Classic, Milfare Desfire, Milfare Ultralight, Legic, Legic Advant |
Card area to be read out | UID (unique identifier): Serial number of the card |
Known blocks/areas in the memory area of the card: with password protection, the password must also be known |
Configuration with Baltech Tool Suite
You can use the Baltech Tool Suite to configure your RFID reader and activate the chip card technology. If the chip card technology is still unknown before configuration, follow the steps below to familiarize yourself with the chip card technology:
- 1. Open the Baltech id-engine explorer program.
- 2. Click on Test Sample Card.
- The chip card technology (MIFARE Classic here) is now known.
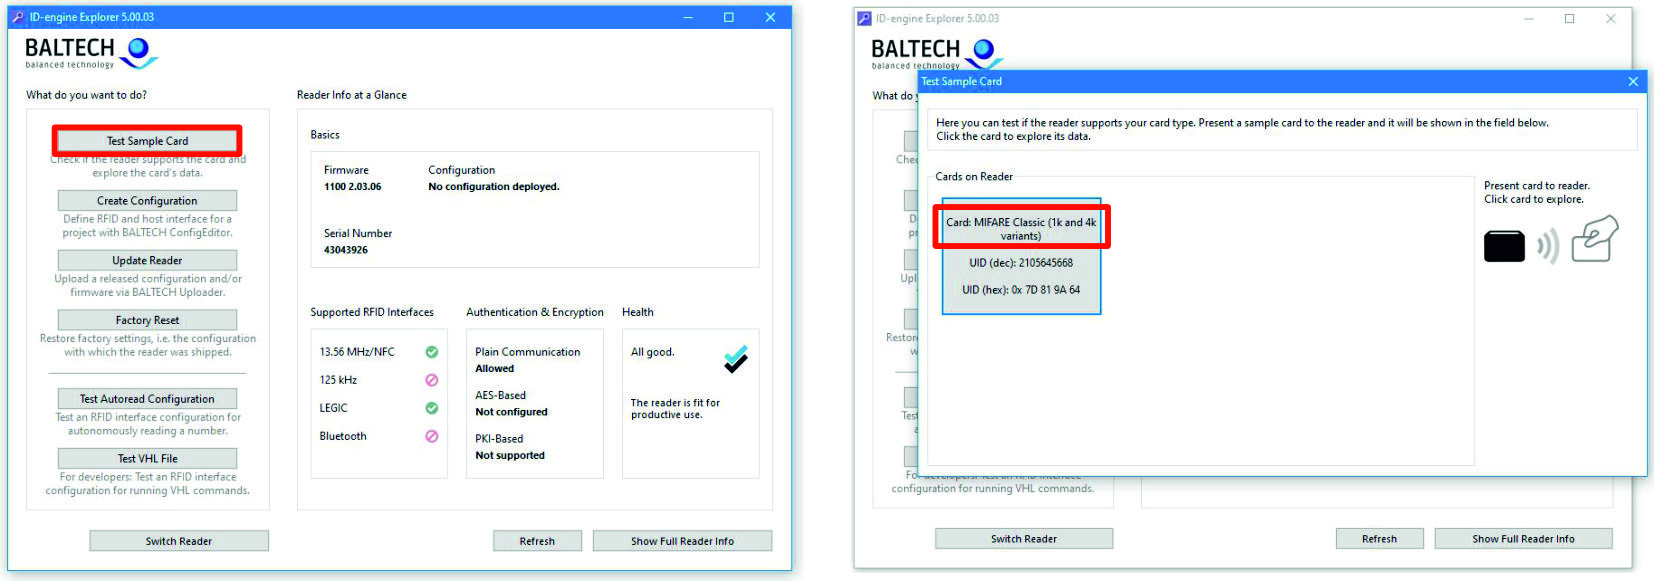 Fig.8: Baltech id-engine explorer
To carry out the configuration, follow the steps below:
- 1. Start the Config Editor software.
- 2. Click on Start Autoread Wizard.
- 3. Now choose the configuration criteria shown in Table 6 Interface (Host Interface), Chip card technology (RFID Interface) and Card area (Number to Read).
- 4. Click on Create Configuration.
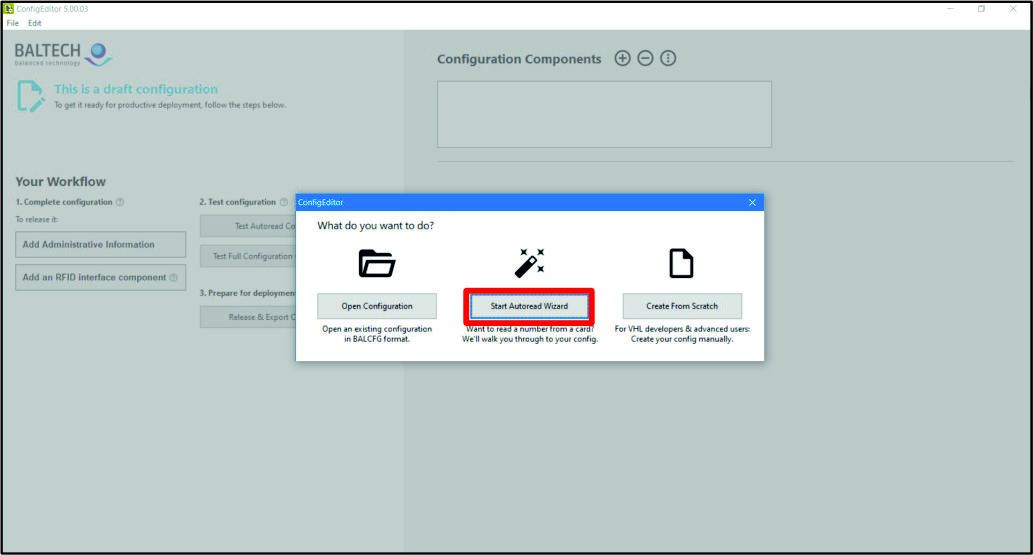 Fig.9: Config Editor
- The configuration is generated. An overview window for your configuration opens.
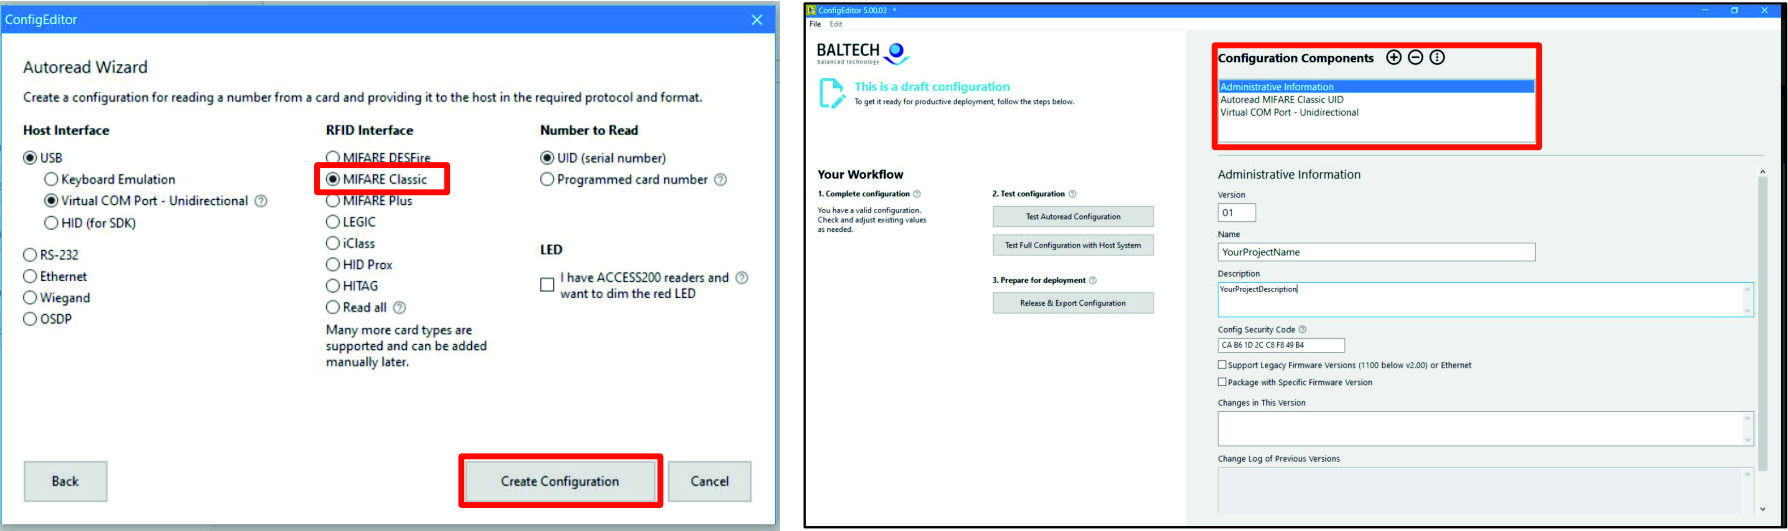 Fig.10: Generate configuration
In the overview window, you can click on individual components of the generated configuration and customize them. You can also test and release the configuration (see below).
Test and release of the configuration
Once you have generated a configuration, you can test it and then release it. You can perform two different tests:
- Test Autoread Configuration
- Test Full Configuration with Host System
On the overview page of your configuration, click on Test Autoread Configuration to check whether the RFID reader reads a card correctly.
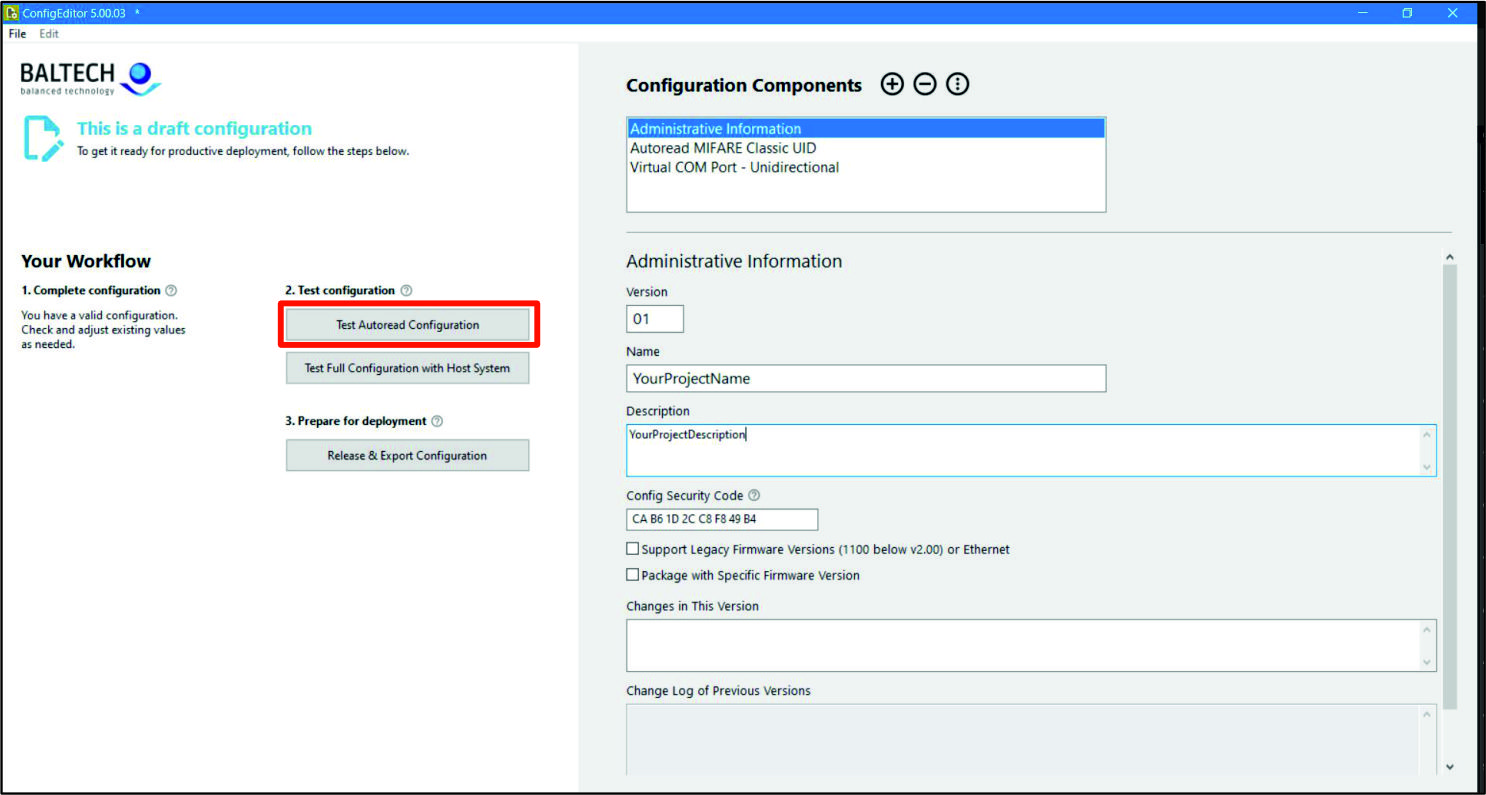 Fig.11: Test Autoread Configuration
On the overview page of your configuration, click Test Full Configuration with Host System to test the interface for data transmission. Click OK in the window that appears.
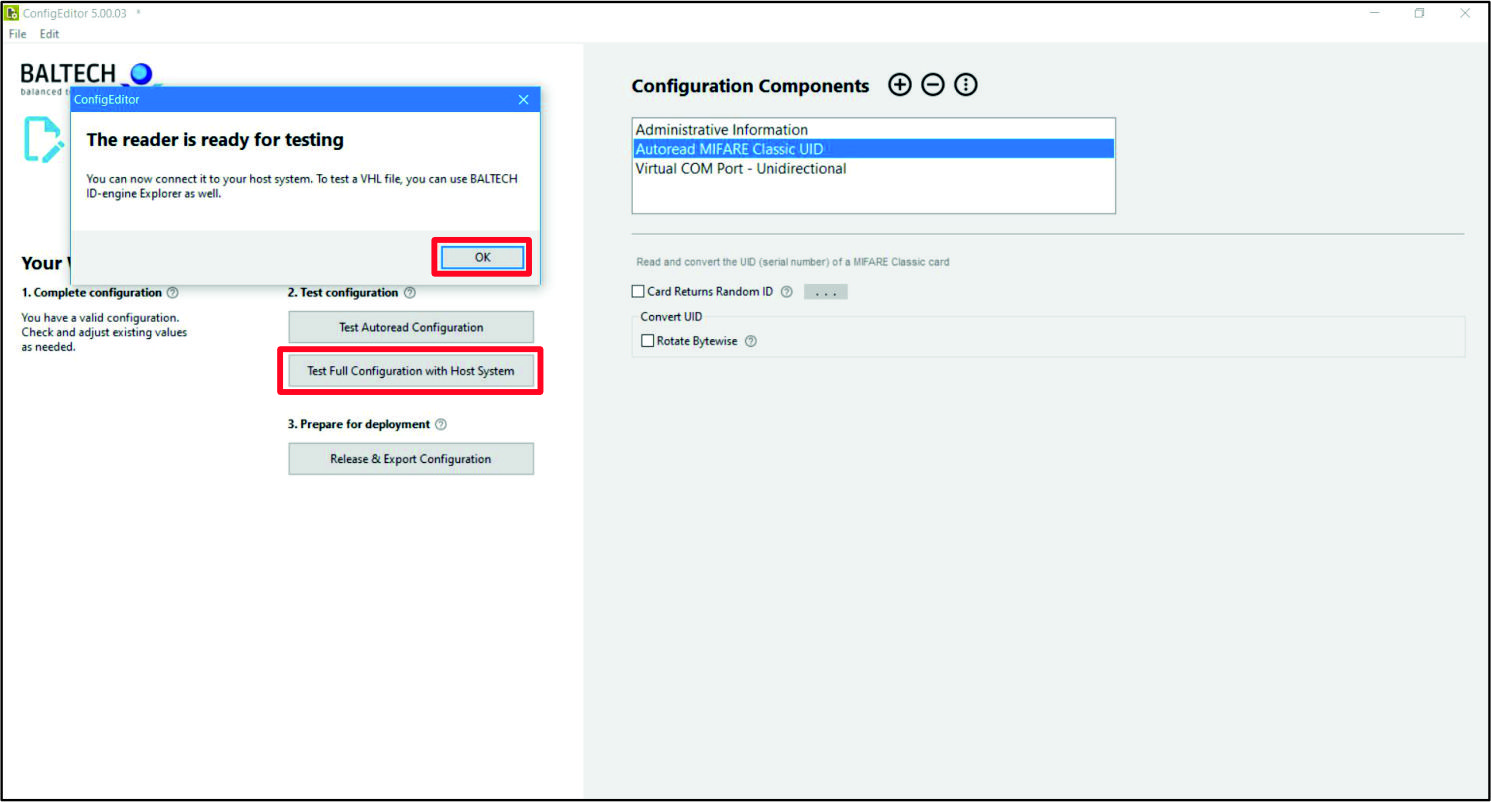 Fig.12: Test Full Configuration with Host System
If you have previously selected USB-COM (default settings: 9600 baud, 8 databits, 1 stop bit, no parity), the RFID reader emulates a COM port, which must be opened accordingly. If you have selected USB keyboard emulation, you must be able to use the RFID reader like a keyboard.
If you are satisfied with the test results, you can specify a storage location for the configuration on your PC. To do this, click on Release & Export Configuration on the overview page.
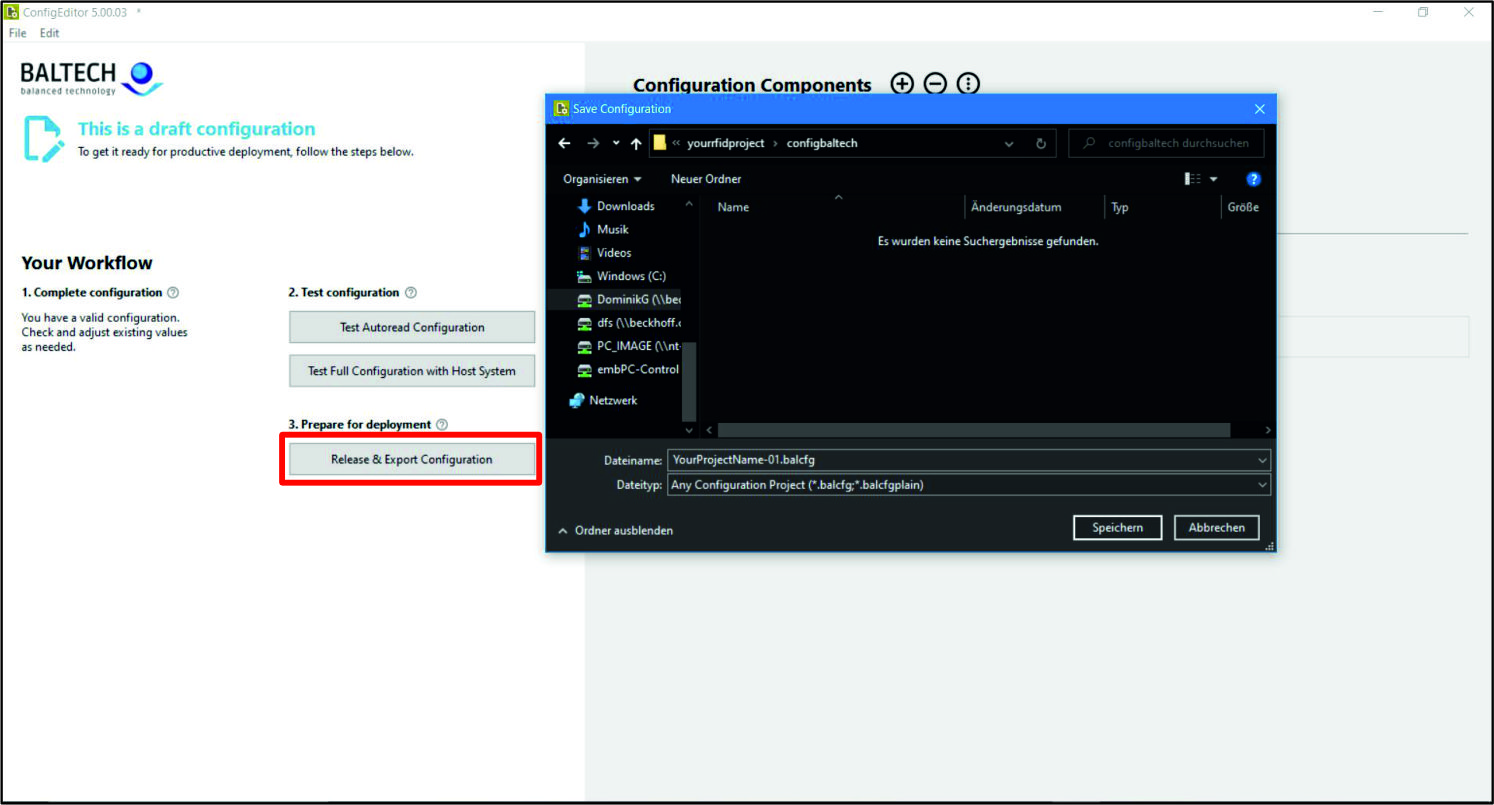 Fig.13: Release & Export Configuration
You then have various options available to you with your configuration. Once you have made all the settings according to your requirements, click on Transfer Config to Reader and close the program.
 Fig.14: Transfer Config to Reader
Uploader Tool
If you want to load other RFID readers with the same configuration, use the Uploader tool from the Tool Suite. Choose the desired procedure in the tool.
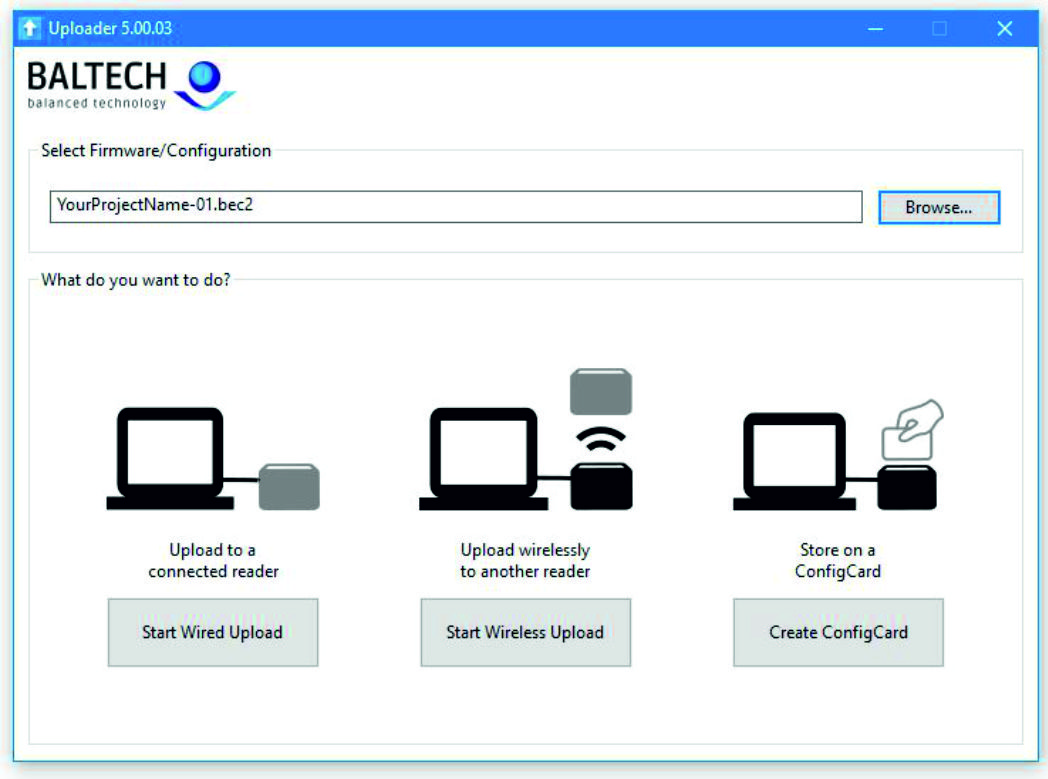 Fig.15: Uploader