Importing the certificate
After you send the certificate signing request (CSR) to the certificate authority (CA), you should receive a response file. Copy the answer file to your industrial PC and then perform the following steps. If you have received more than one file, you ideally need a file with the extension *.p7b that contains the complete certificate chain.
Proceed as follows:
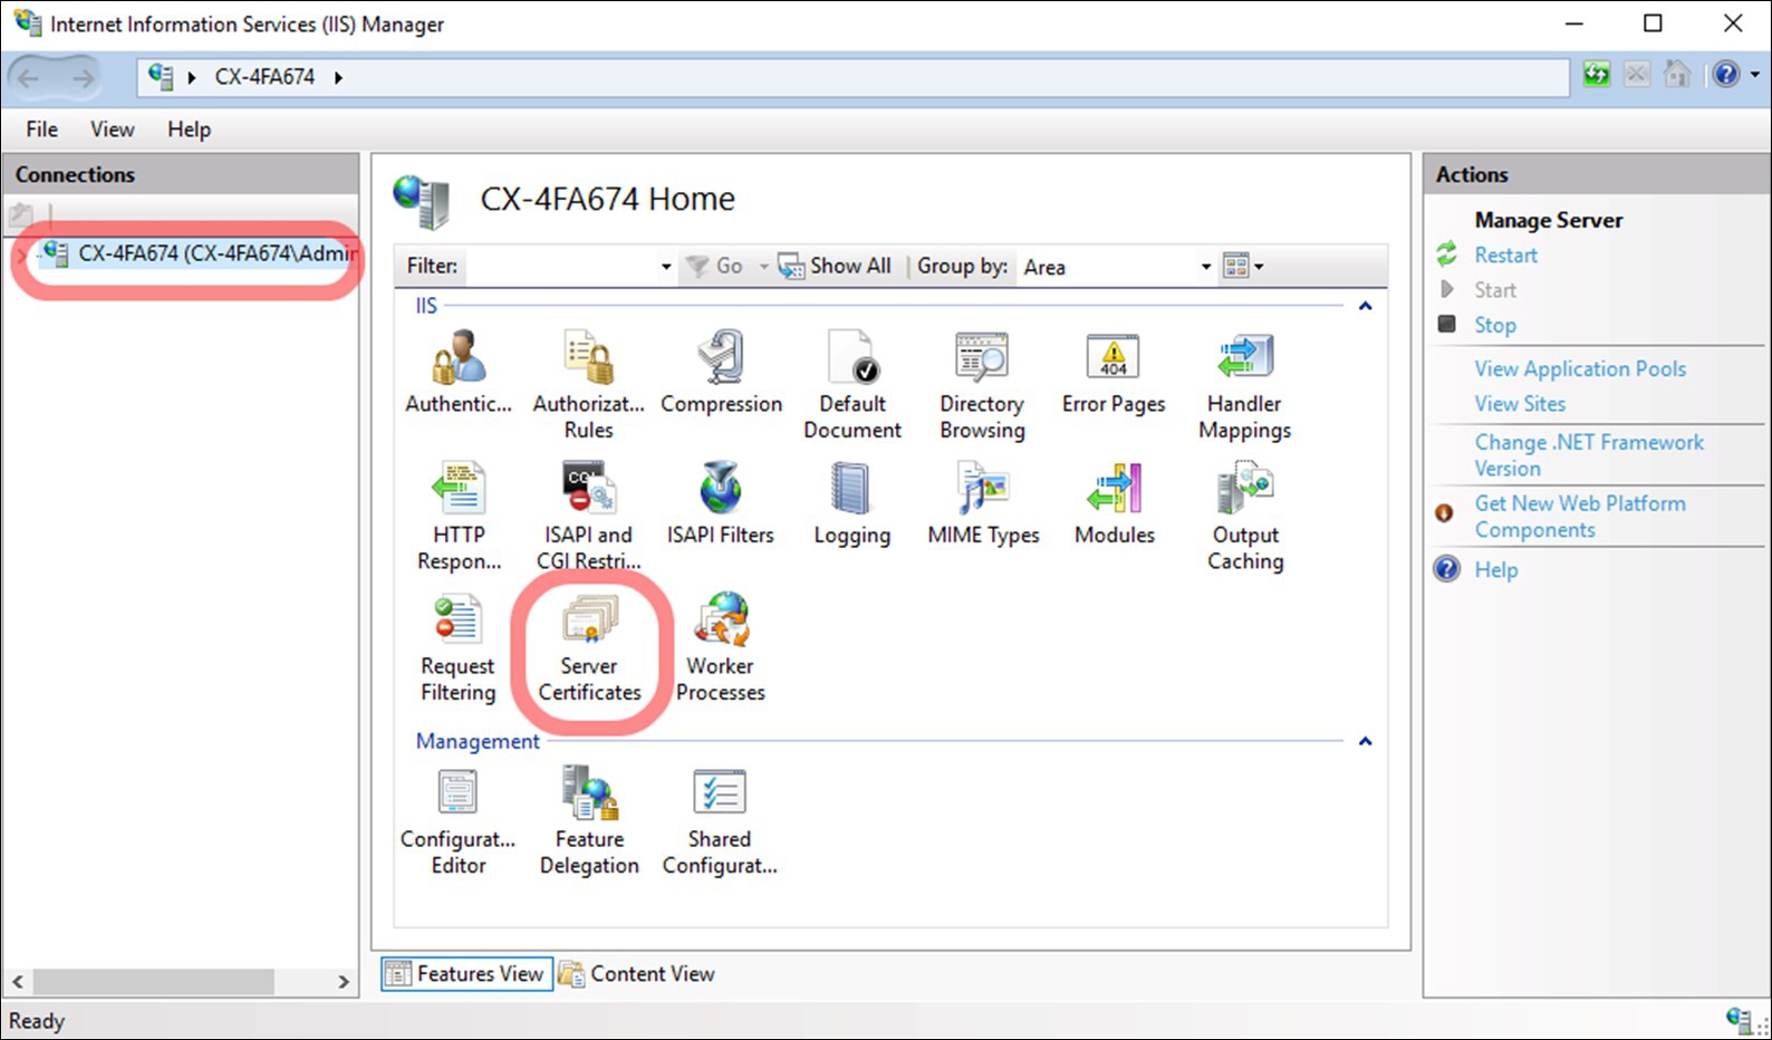
- 1. Open the Internet Information Services (IIS) Manager on your industrial PC as administrator.
- 2. Select your web server from the Connections menu on the left and double-click Server Certificates.
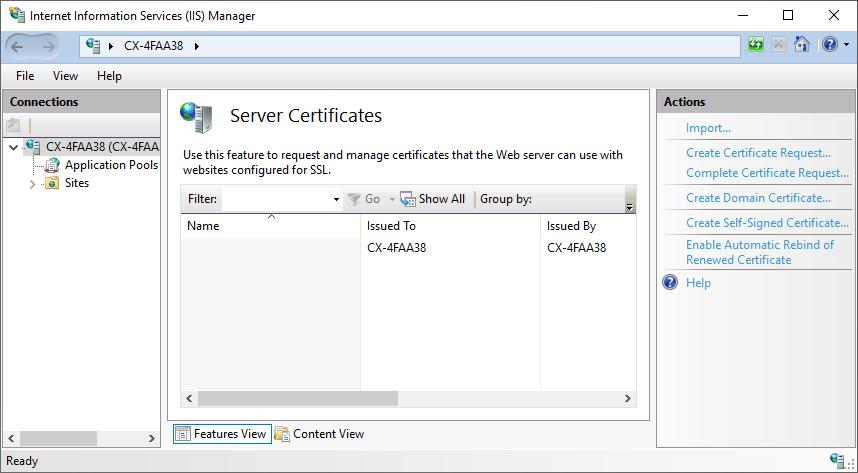
- 3. In the Actions section, click the Complete Certificate Request option and load the certificate to be imported with the *.p7b file extension.
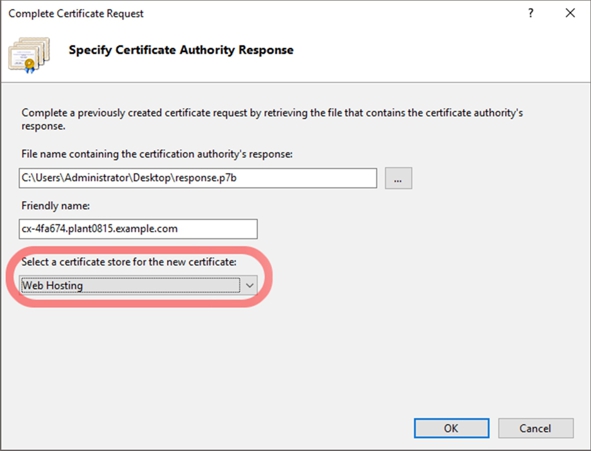
- 4. The Specify Certificate Authority Response window appears. Give the certificate a name with which to store it in the certificate store. Ideally, select the same value that you selected in the Common Name field during the certificate signing request (CSR). Don't forget to select the Web Hosting option for the certificate store.
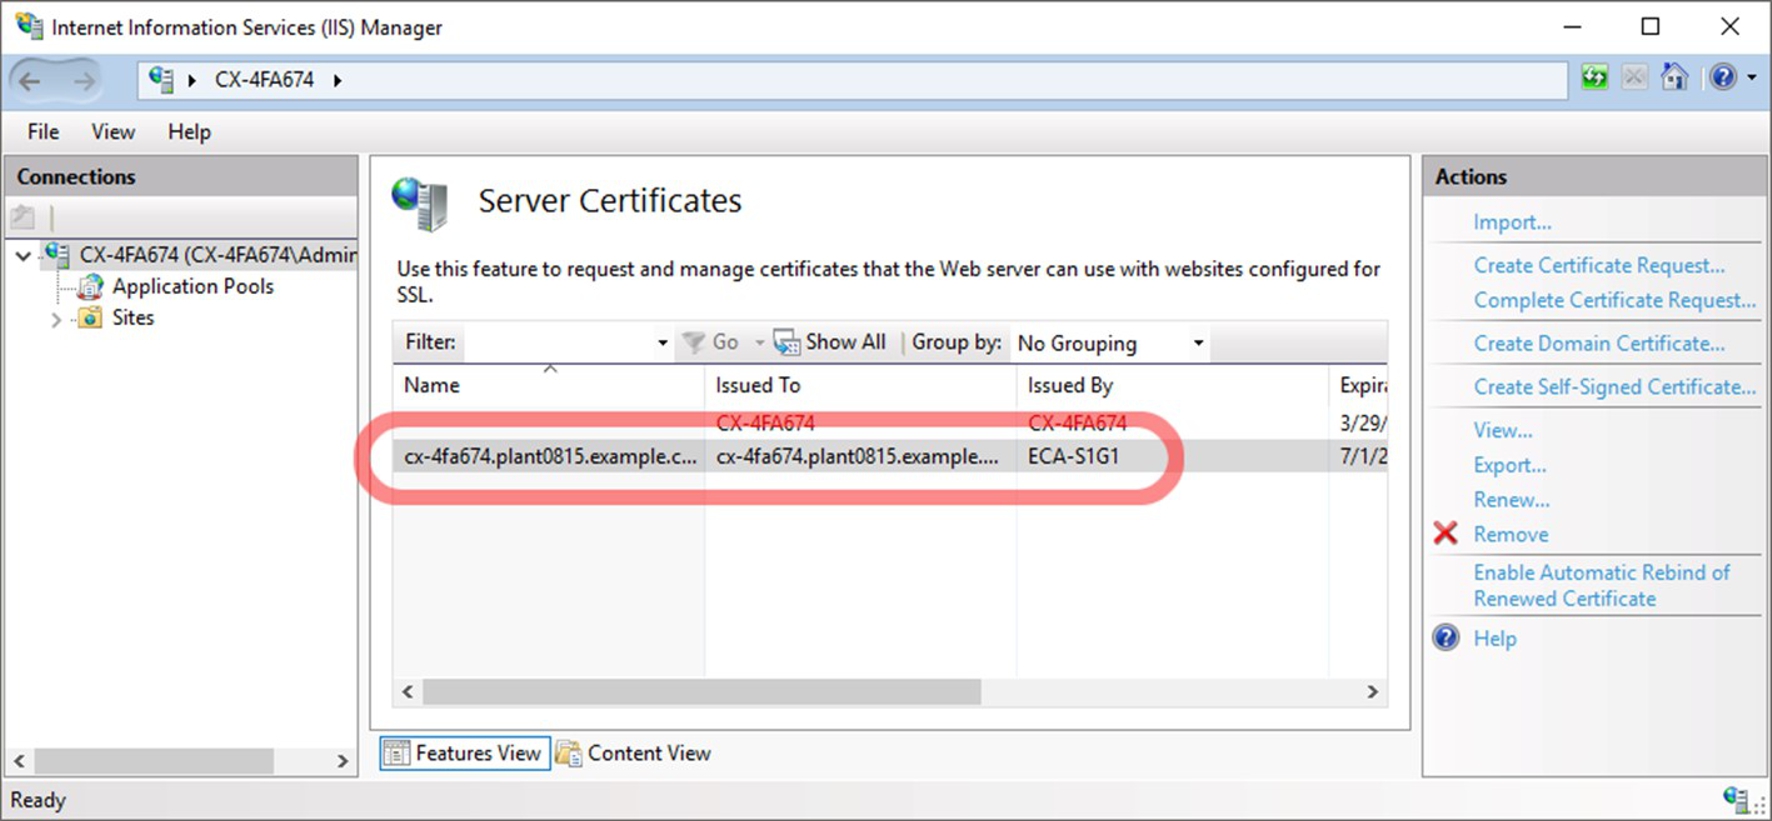
- 5. After the import, the certificate will appear in the list of available server certificates.
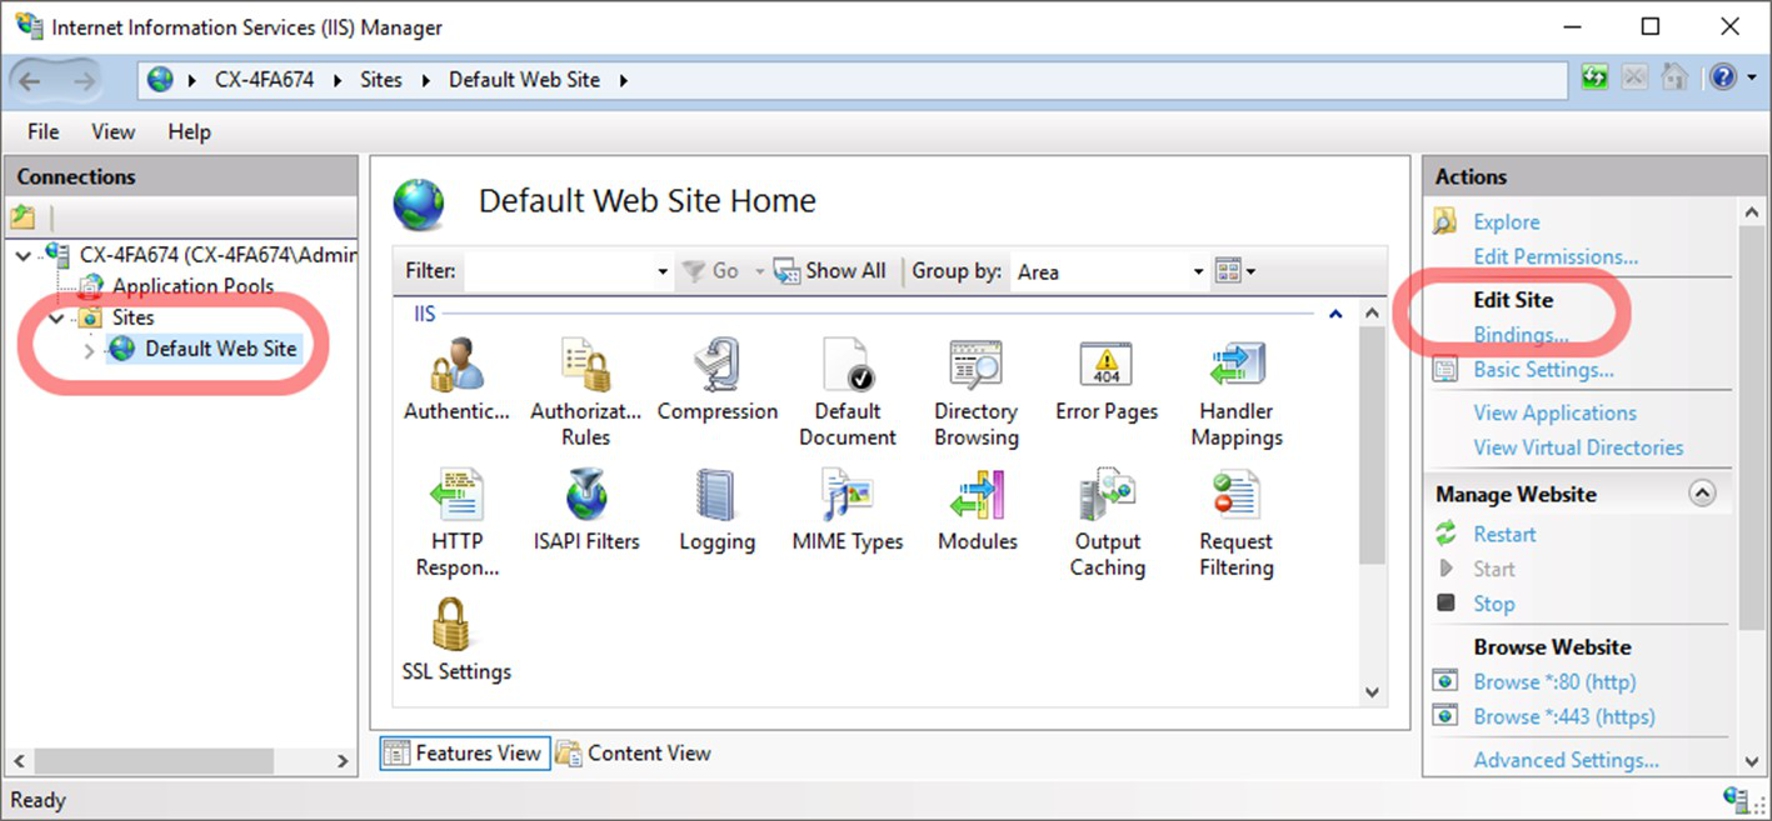
- 6. Click Default Web Site on the left, and then click Bindings in the Edit Site menu.
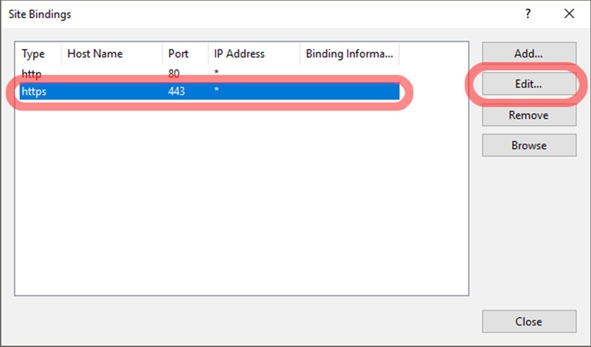
- 7. Click https and then click Edit.
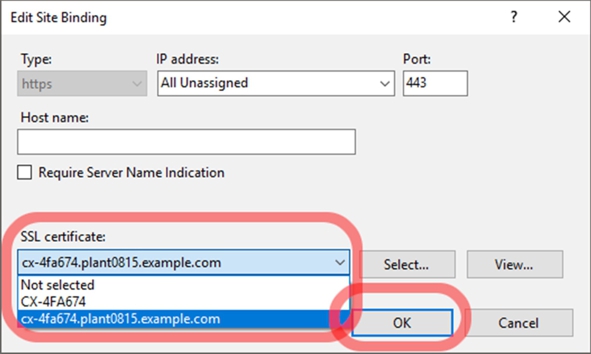
- 8. Select the certificate you imported at SSL certificate and accept the selection with OK.
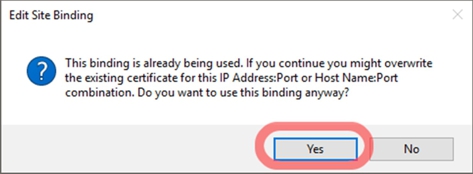
- 9. Confirm the setting to replace the previous certificate and use the newly created certificate instead.
- After the settings, the industrial PC immediately uses the new certificate. You can check this with a client, such as a web browser. Note that you may need to restart your web browser or clear the cache to connect.