Ethernet connector: RJ45
The connection to the Ethernet is done with an encapsulated IP67 RJ45 connector (Western plug).
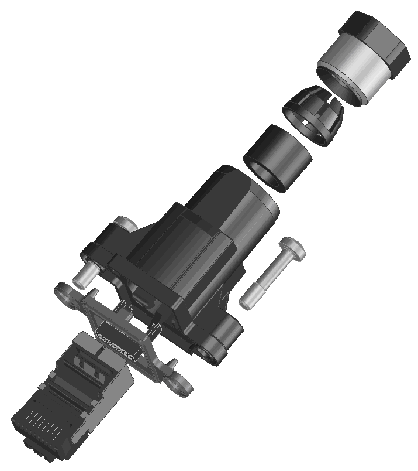
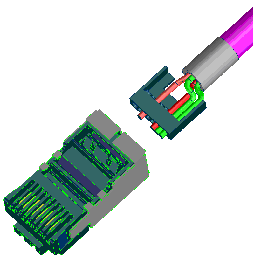
Assembly
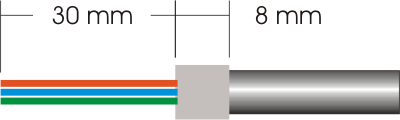
Preparation of the cable
- push the cable gland and the connector case onto the cable.
- strip 30mm of the insulation from the cable.
- cut the shield mesh to 8mm and pull it back over the cable mantle.
- remove all other filling materials, shield strands, plastic wires etc..
- align the single wires acc. to the pin assignment next to each other.
- cut the wires angular to ease the feed into the inlet guide(ca.45°).

Assembly of the connector
- feed the wires into the inlet guide according the pinning.
- pull the guide over the wires until the cut-out reaches the cable mantle.
- check if all wires are in the correct position.
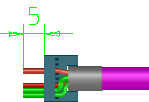
- cut the wires rectangular to 5mm.
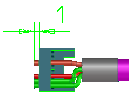
- pull the guide back to the end of the cable until only 1mm stays over.
- push the cable from the backside into the RJ45 connector with the guide . If the cable will not fit into the RJ45 due to its thickness, you can use an edgeless tool to flatten it to feed it into the connector.
- Crimp the cable, when the guide is in its stop position.
Pin assignment of the RJ45 connector
|
PIN |
Signal |
Description |
|---|---|---|
|
1 |
TD + |
Transmit Data + |
|
2 |
TD - |
Transmit Data - |
|
3 |
RD + |
Receive Data + |
|
4 |
- |
reserved |
|
5 |
- |
reserved |
|
6 |
RD - |
Receive Data - |
|
7 |
- |
reserved |
|
8 |
- |
reserved |
Note: There is no standardized color setting for the wires!