Further notes on commissioning
System overview
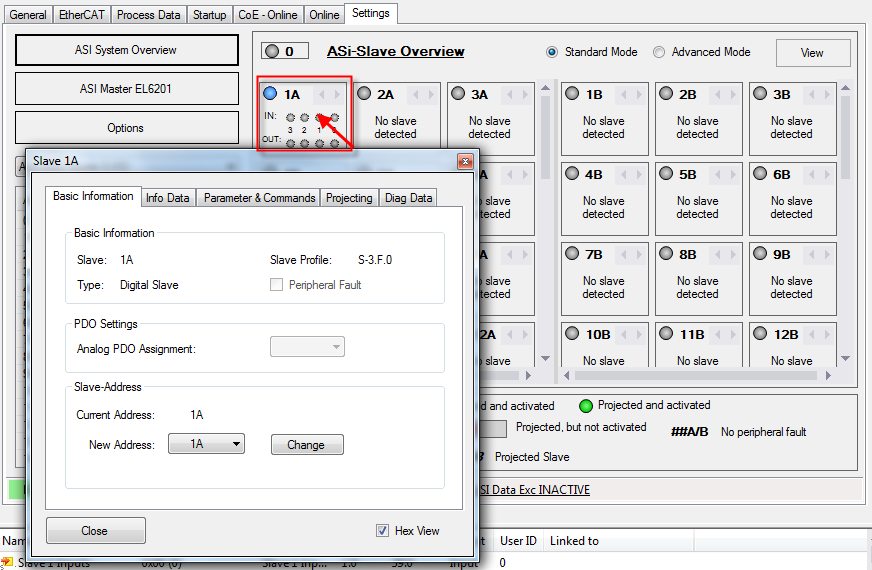
Double-click on a slave in the system overview to open a Properties window (see Fig.), where slave settings can be implemented or diagnostic data viewed.
The slave properties show the slave profile and the diagnostic data. Depending on the slave profile, further options are available, such as AS-i string parameters or string parameters for serial slaves. In addition, parameters can be set and the project planning implemented (manual project planning only in Advanced mode).
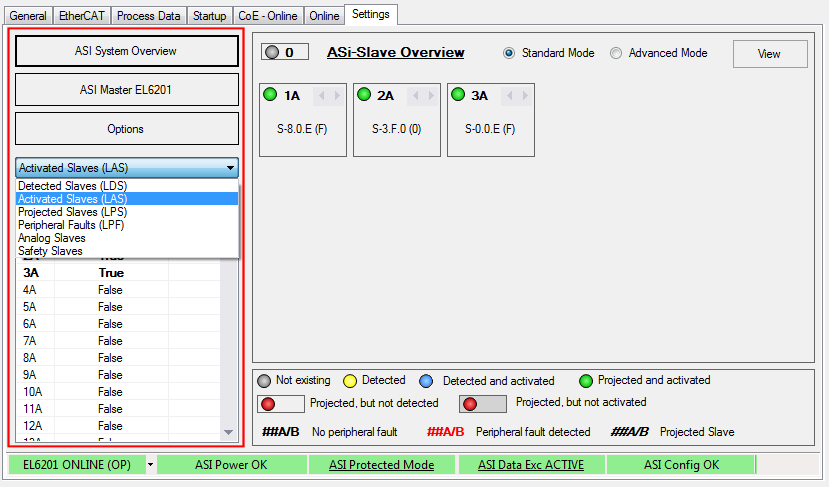
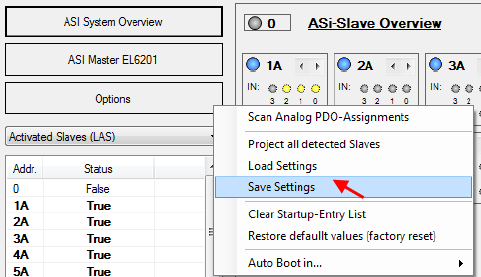
In the left part of the plugins (see Fig.) you can switch between system overview and AS-i master settings or call the Options menu. The AS-i lists provide readily readable information on detected, activated and projected slaves, as well as peripheral errors.
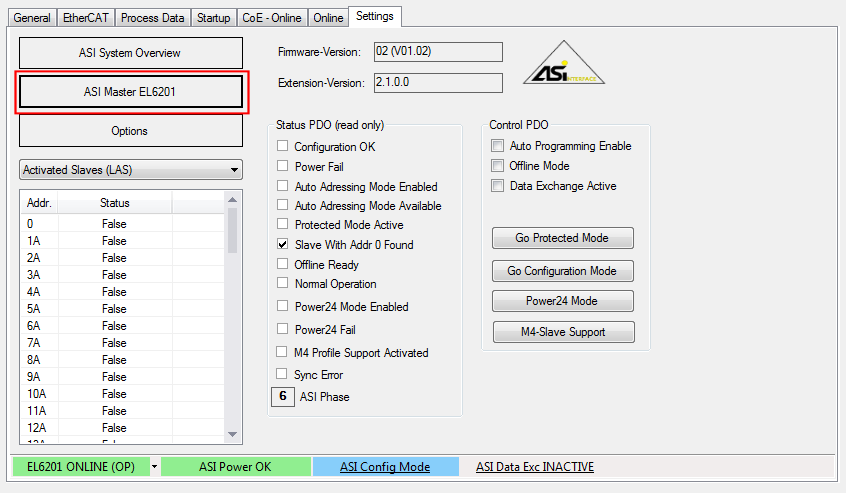
The AS-i master view shows the configurable system status values. It also shows the firmware version and the extension (plug-in) version, which must be quoted with any support requests.
Project planning
The project planning options via the plug-in differ depending on the selected view; the Advanced view differs from the Standard view as follows:
- Standard view
Automatic project planning can be selected (see Fig. Option menu "Project all detected slaves"). The plug-in configures all connected (detected) slaves according to their profile. Once the system has been projected it is ready and operates in protected mode (automatic start in protected mode). 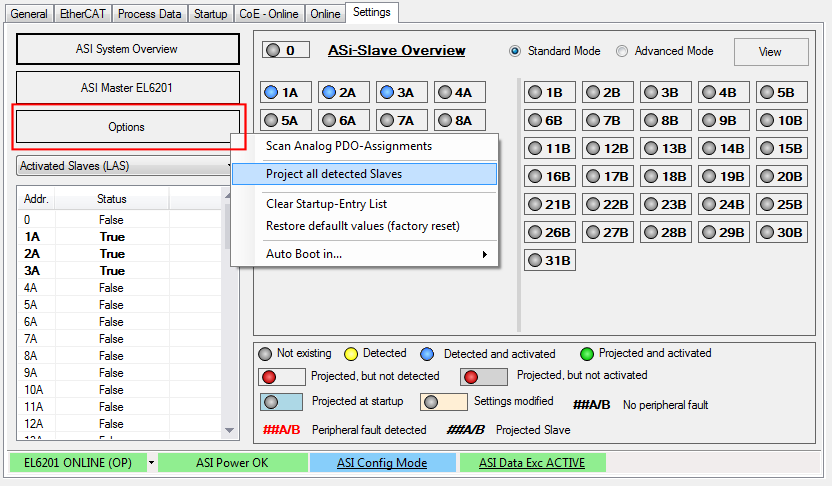
Option menu "Project all detected slaves" - Extended view
In addition, manual project planning options are available. For each slave the required profile can be specified manually via the Properties window
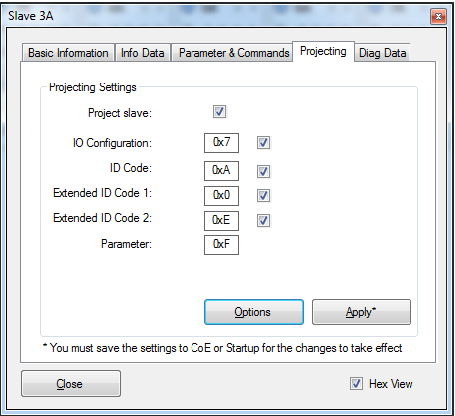
The data can be stored in the startup data or directly in the terminal (CoE) (see Fig.).
Automatic project planning is recommended
 | Notes on the "Auto Programming" function If the function "Auto Programming" is used in Config mode, each new slave with address 0 is automatically assigned the next free address. Note that slaves with the profile S-6.0 can require several addresses. |
Special features of M4 slaves (CTT2, CTT3, CTT5)
- Slave type 3
Slaves of type CTT2 (S-7.5.5, S-7.A.5, S-B.A.5) have a further "Objects" tab in the Properties window (see Fig.), which can be used for acyclic communication with the slave via AS-i string command. 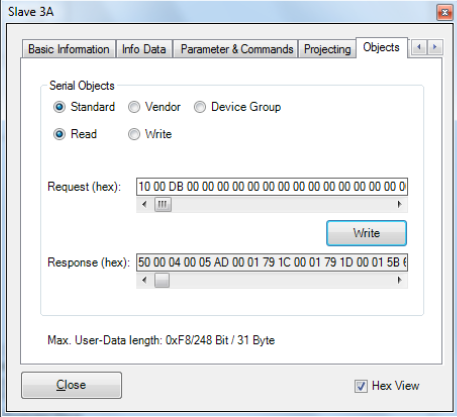
M4 slave, "Objects" tab - Slave type 3
Slaves of type CTT3 (S-7.A.7, S-7.A.A, S-7.A.8) can be used in the A or B section (Extended Address mode). The digital I/O data are stored in the analog process image (inputs: 0x6XXX range, outputs: 0x7XXX range) and shown accordingly in the system overview. - Slave type 5
Slaves of type CTT5 (S-6.0) achieve a higher velocity thanks to the use of several slave addresses. Depending on the slave, the number of slave addresses used can be set via the extended ID code. To change the extended ID code the slave address must be 0, see the figure below.

The process data are stored in the analog slave process data.
| Automatic addressing with slaves type 5 If auto-addressing is enabled in config mode, slaves with address 0 are automatically assigned the next free address. Since slaves of type CTT5 require further slave addresses, depending on the start address, there may be overlaps if there are not enough free addresses. |
CoE extensions
- Access to M4 profiles
- Slaves from CTT2 profile (S-7.5.5, S-7.A.5, S-7.B.A)
- Cyclic communication via analog data object per slave (AODI/AIDI) – address range in CoE 0x6000/0x7000
- Acyclic communication via "AS-i string command" (0x2010-object).
Command structure:
|
Byte |
Content |
|---|---|
|
0 |
Increment for new command |
|
1 |
0x02 (Write Parameter string) |
|
2 |
Slave address* |
|
3 |
Command-Length** |
|
4 - 7 |
Reserved |
|
8.. |
Command |
Example: 01 02 03* 03** 00 00 00 00 10 00 DB
- Slaves from CTT3 profile (S-7.A.7, S-7.A.A), slaves from CTT4 profile (S-7.A.8, S-7.A.9) and slaves from CTT5 profile (S-6.0)
- Data from 4I/4O slaves (S-7.A.7) are transferred directly to the digital input and output data
- Data from 8/8O slaves are transferred to the analog data objects (value channel)
- Changing the extended ID code
- The extended ID code of a slave can be changed, if the slave has the address 0 (and supports this).
- The change is implemented via the object "AS-i command" (0x2000)
Command:
|
Byte |
Content |
|---|---|
|
0 |
Increment for new command |
|
1 |
0xC (change ID Code) |
|
2 |
New ID Code |