Sample program TwinCAT 3

Preparations for starting the sample programs (tnzip file / TwinCAT 3)
- Click on the download button to save the Zip archive locally on your hard disk, then unzip the *.tnzip archive file in a temporary folder.
- Select the .tnzip file (sample program).
- A further selection window opens. Select the destination directory for storing the project.
- For a description of the general PLC commissioning procedure and starting the program please refer to the terminal documentation or the EtherCAT system documentation.
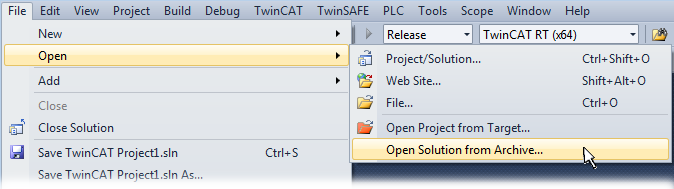 Fig.168: Opening the *. tnzip archive
- The EtherCAT device of the example should usually be declared your present system. After selection of the EtherCAT device in the “Solutionexplorer” select the “Adapter” tab and click on “Search...”:
- Checking NetId: the “EtherCAT” tab of the EtherCAT device shows the configured NetId:
 .
.
The first four numbers must be identical with the project NetId of the target system. The project NetId can be viewed within the TwinCAT environment above, where a pull down menu can be opened to choose a target system (by clicking right in the text field). The number blocks are placed in brackets there next to each computer name of a target system. - Modify the NetId: By right clicking on “EtherCAT device” within the solution explorer a context menu opens where “Change NetId...” have to be selected. The first four numbers of the NetId of the target computer must be entered; both last values are 4.1 usually.
Example: - NetId of project: myComputer (123.45.67.89.1.1)
- Entry via „Change NetId...“: 123.45.67.89.4.1
 Fig.169: Search of the existing HW configuration for the EtherCAT configuration of the example
Also see more hints in section:
Commissioning, TwinCAT Quickstart, TwinCAT 3, Startup.