First steps with BACnet/IP
The BACnet/IP supplement is already installed on the CX8091. BACnet/IP is only supported via Ethernet ports X101 and X102. The Ethernet port X001 is not used for BACnet applications. It can be used for programming and configuration. However, this is not necessary, since the switched port X101/102 can also be used for these purposes.
For the example you need a PC with TwinCAT R3 build 2241 or higher, a digital input terminal (KL1104), a digital output terminal (KL2114) and a KL9010 end terminal. Connect the terminals to the CX8091. To test BACnet you need a PC with Intel chipset and real-time Ethernet driver installed.
First steps
- Disable the OPC UA server (see Deactivating the OPC UA
server)
- Connect your PC with the CX8091 X101. The IP address is set to
DHCP by default (see Address
selection switch).
A local IP address is issued if the CX is operated in a local network without DHCP server. Usually this takes 2 to 3 minutes.
- Switch TwinCAT on the PC to Config mode (blue TwinCAT icon) and
start the System Manager.
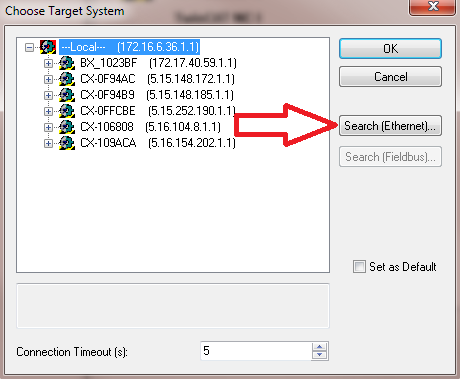
- Then use a broadcast search on your programming PC to find the
CX. In the System Manager, click on the PC symbol (Choose Target
System) or press >F8<
-

- The following dialog box opens; click on Search
(Ethernet).
-
- Select option 1 if DHCP was used for addressing or option 2 if
the IP address was not allocated by the DHCP server.
Then click on Broadcast Search. -
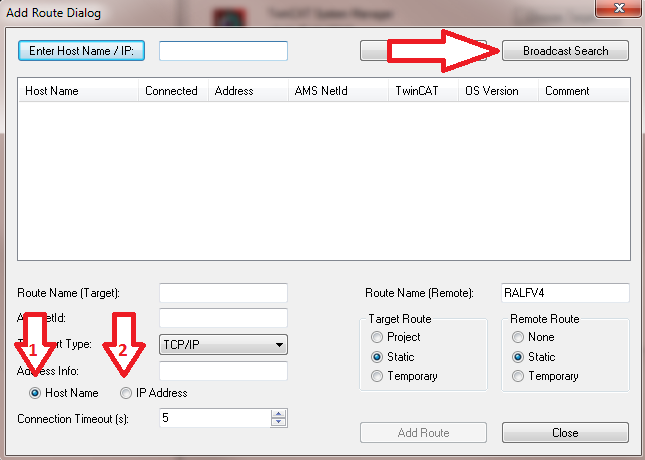
Your network is scanned for Beckhoff controllers. If none is found, this means that the DHCP of the controller is not yet completed or the network settings on your PC are incorrect. Another reason may be a disconnected network cable.
- By default the host name made up of "CX-" and the
last 4 bytes of the MAC address. You can find the MAC address on
the side of the CX80xx. The MAC address is always 6 bytes long and
the first three bytes are the vendor ID, which is always 00 01 05
in the case of Beckhoff devices.
-
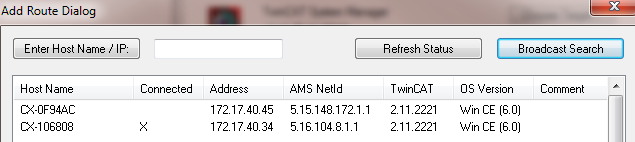
An X next to connected means that the CX is already known in the system and can be used. To make it known, click in the list on the CX with which you want to connect and then click on Add route. An input mask opens with User name and Password. By default there is no password, simply confirm by clicking on OK. Afterwards the X should appear next to connected.
- The CX should now appear in the list of devices. Select it and
confirm with OK.
- In the bottom right corner of the System Manager check whether
the connection is available. The indicator must be blue or green
but not yellow.
-

- If the indicator is green, switch the CX to Config mode
([Shift] [F4], or press the blue TC icon in the System
Manager).
The System Manager will now prompt you whether you want to switch to Config mode. Confirm with OK.
- The indicator at the bottom right of the System Manager
switches to blue. The TC LED of the CX80xx should now also be
blue.
- Now click on I/O Devices and then on Scan
Devices.
-
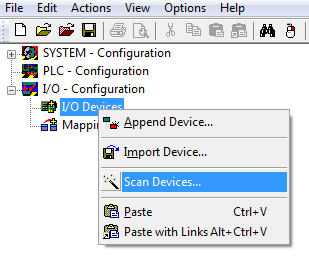
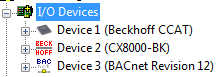
- A message appears to indicate that not all devices were
detected automatically.
- Usually the CCAT interface (CX809x) or the corresponding
fieldbus interface (other CX80xx devices) is found plus either a
K-bus interface or an EtherCAT interface, depending on which
terminals are connected to the CX.
-
The CCAT interface must be present in the System Manager file and may not be deleted.
If an error message should appear when scanning, check the revision level of your TwinCAT version and perform an update if necessary.
- Click on the BACnet device and add a BACnet server.
-
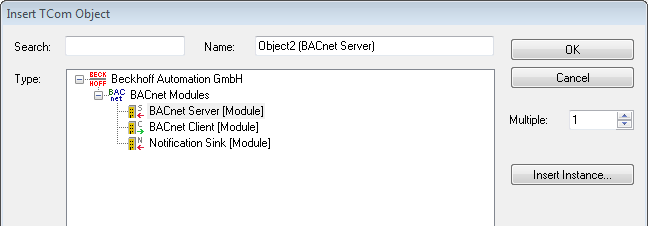
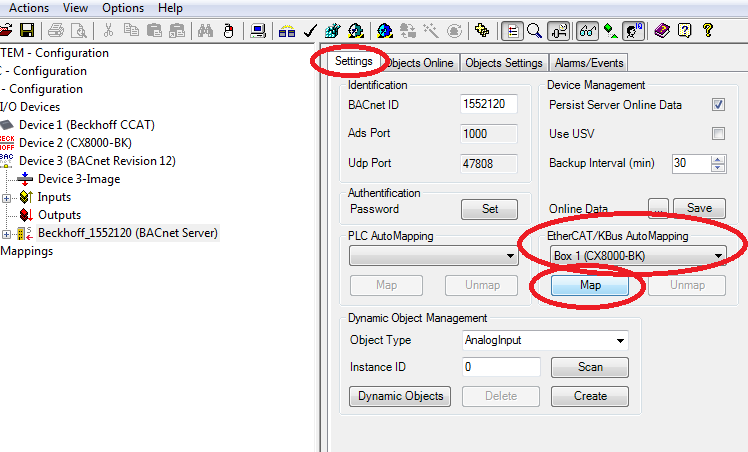
- Now select the server.
In the Settings tab then select EtherCAT/K-Bus AutoMapping and press the Map button.
Confirm the next dialog also with Map -
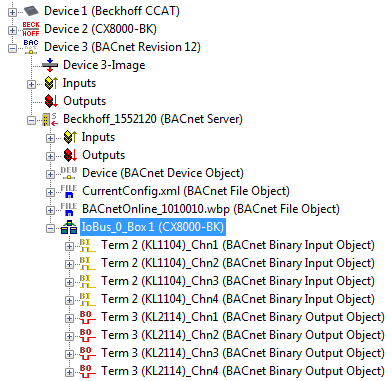
- After successful mapping your configuration should have been
extended with the BACnet objects corresponding to the
terminals.
-
- Now activate the configuration. A PLC program is not
necessary.
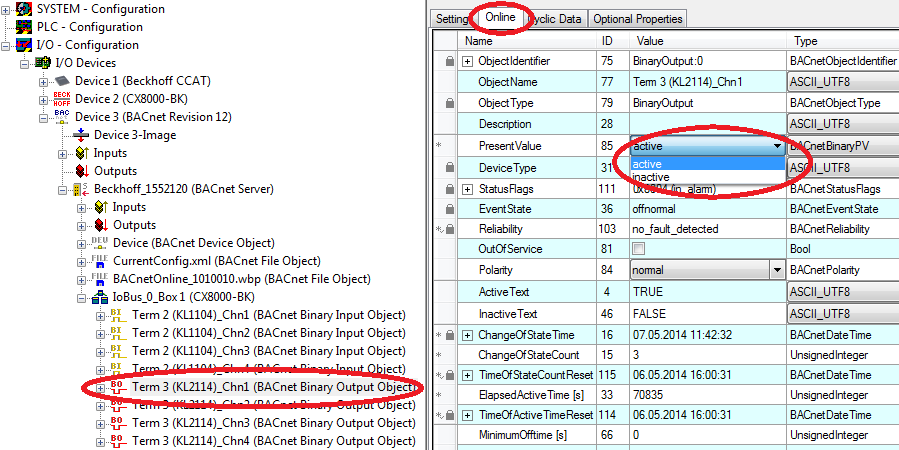
- For the first binary output click on the Online tab and
set the PresentValue to active. The digital output
should now switch on.
-
If not, check the following: - The cabling: is the 24 V supply connected to the power contacts?
- Does the K-bus/E-bus have a fault?
- Is the CX in Running mode? (TwinCAT icon and/or TC LED on the
CX8091 green?)
- If your PC has an Ethernet chipset from Intel, you can now
operate this PC as a BACnet client, scan the BACnet network, add
the CX8091 and control the digital output with the BACnet client.
Ensure that you are in the same IP network.
-
