Installation on the mounting rail
Snapping onto the mounting rail
The CX20x0 can simply be snapped onto the mounting rail. The bar clips are inserted on the top side and underside Then simply position the block on the mounting rail and push it slightly until it engages on the right-hand side. This is indicated by a distinct click. The bars are then engaged again. The engagement of the individual bars is indicated by a distinct click.
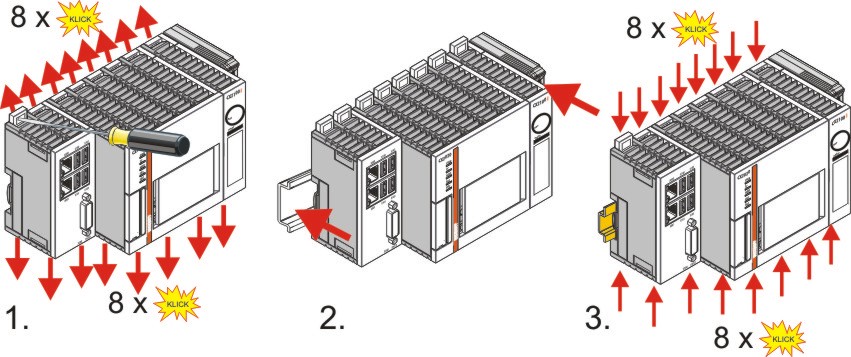
Do not force the module or apply excessive pressure!
Installation position
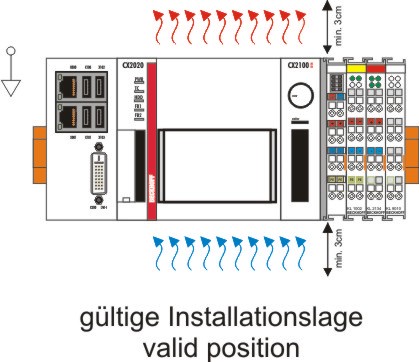
The maximum ambient temperature for CPU modules mounted on a DIN rail is 60°C. The orientation in which the device is fitted must be selected in such a way that cooling air can flow vertically through the ventilation holes. The images below show the permitted and two incorrect installation positions. Mounting must provide a clearance of 30 mm both above and below a CX20x0 device combination to ensure adequate ventilation of the base CPU module and the power supply unit.
Correct installation position
The high performance and the compact design of the CX20x0 systems may result in increased heat generation. The heat is dissipated via a passive ventilation system. This system requires the unit to be mounted correctly. Ventilation openings are located at the top and bottom of the housing. The system therefore has to be installed horizontally. This ensures optimum air flow.
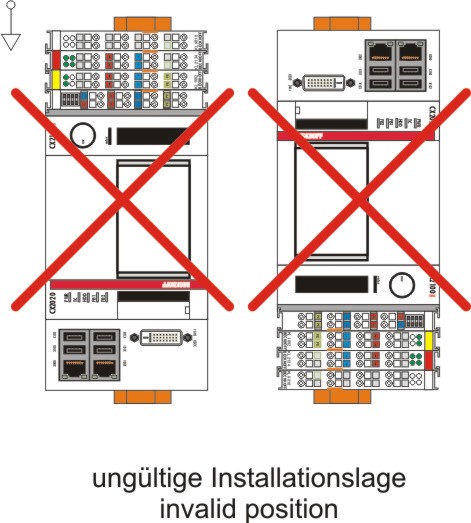
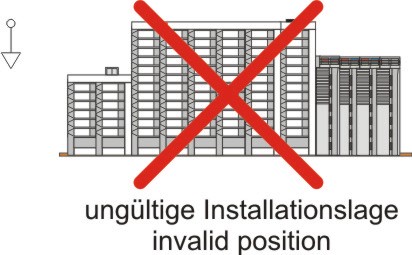
Incorrect installation positions
The CX20x0 system must not be operated vertically on the DIN rail. A vertical position would lead to insufficient CPU ventilation, since the ventilation openings are located on the top and bottom of the housing. Installation of the system on its side would also lead to inadequate ventilation.
|
|
|