BX9000 - First steps
Change the IP address
Default IP address: 172.16.21.20
SubNetMask: 255.255.0.0
Default gateway: 0.0.0.0
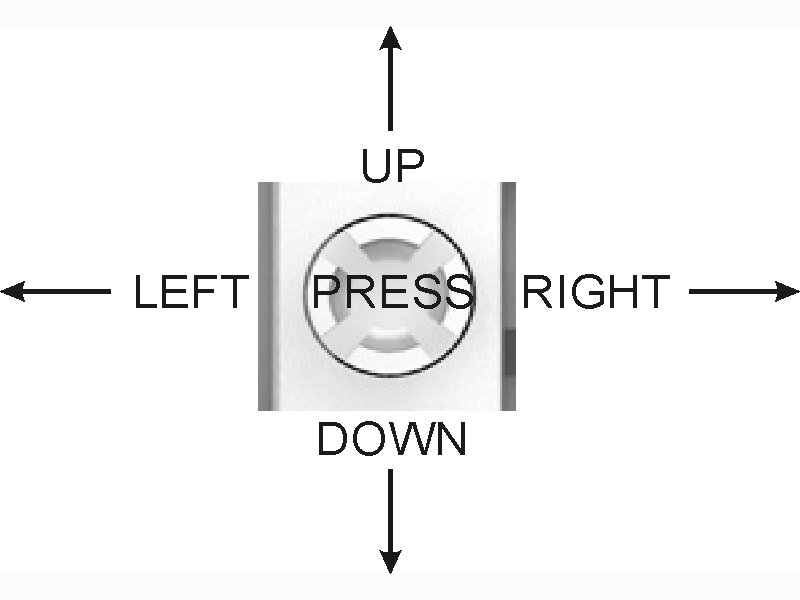
To switch to the menu, press the navigation switch for three seconds. The menu directory appears.
- Use the RIGHT/LEFT keys to switch between the menu items (row 1 of the display shows the active menu level).
- Press the DOWN key to change to a submenu.
- Press the UP key to return to the main menu.
Row 1 of the submenu shows the menu item, row 2 shows the current setting of the menu item.
Some entries cannot be changed (read only). These entries enable verification or provide information for the user. To exit the menu display, return to the main menu and press the navigation button for three seconds.
A password must be specified before changes can be saved. The password is retained during firmware updates or a reset to the delivery state. Should you forget the password, you have to return the BX controller for resetting.
Switch assignment
Code
The factory setting is "****", i.e. no password is set. A password is required for setting parameters.
Menu navigation
Open the menu directory by pressing the navigation switch for three seconds. Some of the menu items are explained below.
|
MENU |
Main menu | ||||||||
|
|
DOWN (press briefly) | ||||||||
|
|
PASSWORD |
???? - password set | |||||||
|
|
PRESS (press briefly) |
| |||||||
|
|
PASSWORD ENTER? |
Do you want to set a password? | |||||||
|
|
PRESS (press for approx. two seconds, then enter the password) |
| |||||||
|
|
PASSWORD |
Enter password | |||||||
|
|
PRESS |
| |||||||
|
|
PASSWORD |
Enter password | |||||||
|
|
Press UP |
| |||||||
|
MENU |
Main menu |
| |||||||
|
Press RIGHT |
|
| |||||||
|
AMS |
AMS menu |
| |||||||
|
Press RIGHT |
|
| |||||||
|
ETHERNET |
ETHERNET menu |
| |||||||
|
Press DOWN |
|
| |||||||
|
|
MAC ID
|
ETHERNET menu / MAC ID | |||||||
|
|
Press LEFT |
| |||||||
|
|
IP ADDRESS
|
ETHERNET menu / IP ADDRESS | |||||||
|
|
Press DOWN to enter the IP address |
| |||||||
|
|
MODIFY
|
ETHERNET menu / IP ADDRESS / Edit IP Address | |||||||
|
|
Press the button for two seconds until ACCEPT? appears |
| |||||||
|
|
ACCEPT ?
|
ETHERNET menu / IP ADDRESS / Edit IP Address | |||||||
|
|
Press the button when ACCEPTED appears |
| |||||||
|
|
ACCEPTED
|
ETHERNET menu / IP ADDRESS / Edit IP Address | |||||||
|
|
Press UP to exit the IP address |
| |||||||
|
|
ETHERNET |
ETHERNET menu | |||||||
Press for three seconds to exit the menu
Next step
Install TwinCAT 2.10 (can be found on the BX CD)
Add the BX controller in the AMS router
Restart TwinCAT - you can now program the BX9000.
Start the PLC Control program and create a new project.