Assembling the coil unit
The mounting surface must always be free from contamination. Particles with a size of more than 0.1 mm can result in incorrect configuration and damage to the linear motor.
Mounting of the coil unit on the clean mounting surface of the carriage is not hindered by attractive forces!
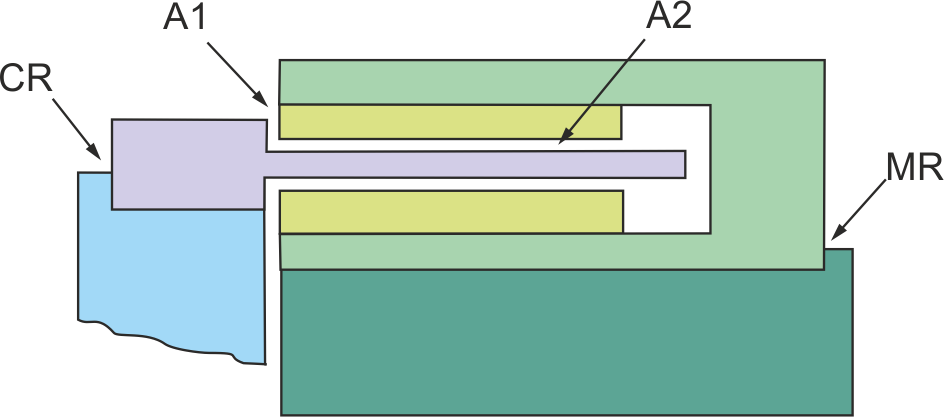
An axis reference for the coil unit (CR) is achieved as follows:
- Two alignment pins next to the first and last bolt of the coil unit
- Milling reference along the entire path (inside radius < 0.2 mm)
Procedure:
- Insert the coil unit in the magnet yoke and position it on the mounting surface
- Align the coil unit with the axis reference
- Secure the coil unit with bolts
- Observe the specified tightening torque!
The exact air gap dimensions (A1 and A2) can only be achieved, if the references and measurements mentioned above are adhered to.
For applications that are subject to vibrations, the bolts must be secured (e.g. with clamping rings or thread locking compound)
 | Thermal protection If the linear motor is operated continuously at its rated output, thermal compound should be used, in order to optimize the thermal contact between the coil unit and the mounting surface. |