Localization editor
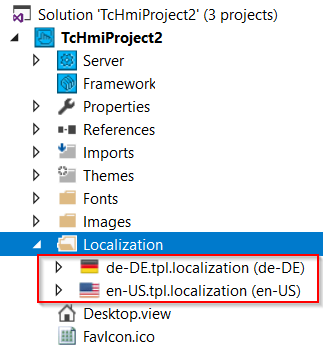
You can open the Localization editor in the Solution Explorer by double-clicking on the respective language file.
The Localization editor enables the editing of language files.
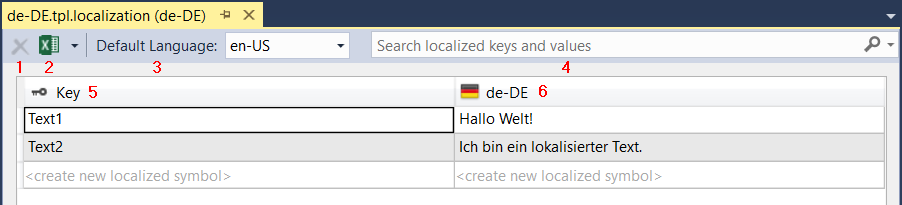
- Removes a selected entry (key and language entry) from the language table.
- Export or import the Excel table or CSV.
- Defines the default language in the HMI project.
- Search for keys or language entries.
- The key must be unique and is linked with a control in the Designer at a later date. The language entry of the currently active language is then automatically displayed.
- The language entry contains the text for the key.
Adding a new language entry
To create a new localization entry, click in the last row of the table on create new localized symbol. A unique key must exist for each entry.

Further languages can be displayed via the context menu of the table.

It is not possible to edit the additionally displayed language in this table. To do that you have to open the respective table for the language.
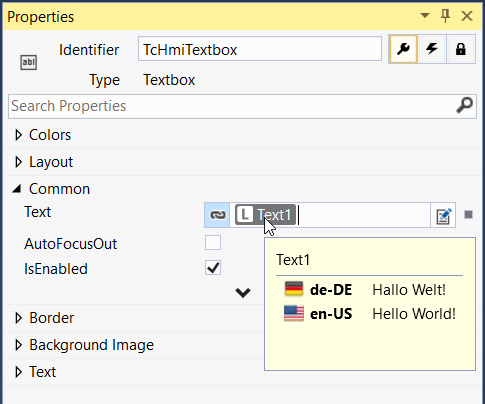
In the Designer you can link the language key directly to the property of a control as a symbol. The language symbols are marked by an "L". When hovering with the mouse pointer over a language symbol, the corresponding language entries are displayed.