Setting up the EK9500 in RS Logix Studio 5000 via EDS File


You can choose between
- Create generic description (valid for all configuration) – using more than one coupler in your project
- Create detailed description (only valid for current configuration) – using only one coupler in your project
This is an example of how to set up the EK9500 in RS Logix Studio 5000 using the EDS File that can be exported from the Device Manager:
Click on the “Create EDS File” button referenced above. This will create the EDS file that you can import into the Rockwell Software. Once you have successfully imported the EDS file into the Rockwell software, most of the configuration will be taken care of automatically.
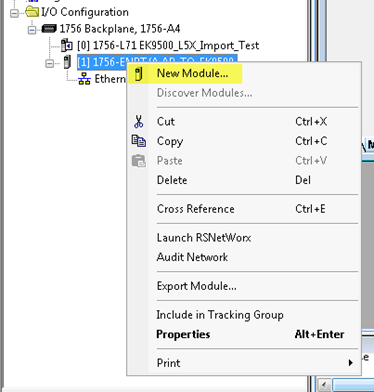
Configure your Hardware as appropriate in RS Logix Studio 5000 and then add a “New Module”:
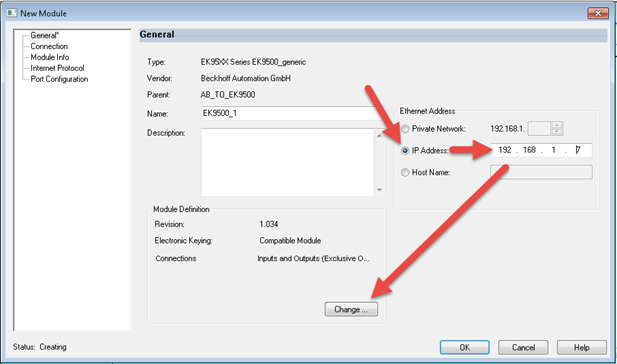
Search for the EK9500 (This will only work after you have imported the EDS file):

Enter the IP Address that was configured for the EK9500 and then click on Change:
Set the data size according to what is shown in the EIP Mapping:
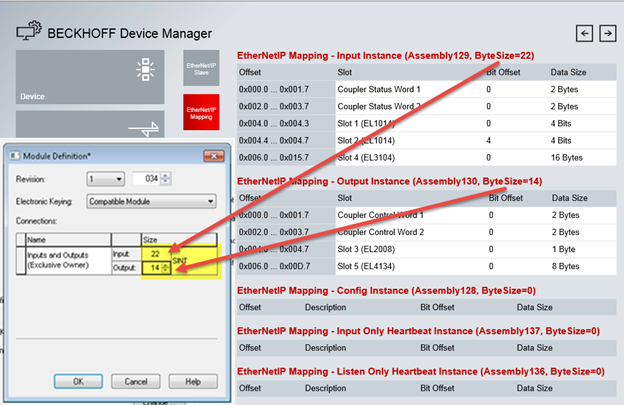
All of the Assembly Instance data is read from the EDS file (Input: 129, Output: 130, Config: 128). Once you download the configuration and go online the communication will start up automatically.
Create L5X File
For RS Logix Studio it is possible to generate a data structure for in and output to get a easier mapping information about the connected EtherCAT terminals or modules (“module-defined”).